Photography
This article describes the process of imaging insect specimens in a museum setting. It will describe general set up techniques for imaging systems and enumerate example systems. This article gives information on how to use related common software as well as tips and trouble shooting. This article will discuss general matters and give system specific examples in related articles. You can find additional information on Human Culture and Ants.
Principles of Montage Photography
Montage photography, also called Image Stacking, is a photographic approach that allows photographers to overcome the limitation of depth if field. It does this by creating sharp source images at multiple focal lengths and compiles them into a single image with all focal planes in focus.
Sophisticated software allows for the creation of 3D images and depth of field information that allows morphometric data to be gathered.
Specimen Preparation
Image Workstation Location
If possible place the workstation in a room where sun light can be excluded, vibrations are minimal, dust is not a problem, and a large enough work surface exists.
Ergonomic chairs are highly recommended.
Imaging
The sections below break down the auto montage process. This section is meant to provide a check list of protocols and essential ideas. Specific detailed protocols will vary from system to system.
Microscope
Microscope should meet the following minimal criteria.
- Clear optics
- A zoom range appropriate to the size of specimens being imaged. 1 to 60 is a good range that will handle most specimens.
- Course and Fine Focus adjustment
- Adjustable light diaphragm
- A trinocular head is strongly recommended for attachment of a camera.
- 0.5x 0.63x, 1.0x 1.5x and 2.0x bottom objectives increase the range of what can be imaged.
- Couplers connecting microscope to camera. T-Mount connects camera to interface lens. C-mount connects interface lens to microscope. Interface couplers are provided by 3rd party vendors.
- A grey card (40% neutral) is a standard background.
Camera
This section breaks down various camera options.
Video Chip Camera
- Provides lives video feed of the specimen.
- Tend to be rather expensive.
- Resolution is not on par with DSL cameras.
Digital SLR
- Highest resolution.
- Body can be purchased without lenses.
- Pick a camera with drivers that allow you to run the camera from a computer.
Point and Shoot
- Inexpensive
- Not all have adapters readily available.
- Resolution is not on par with DSL cameras.
Lighting
This section will describe general principles of lighting and illustrate various systems. In general LED lights are preferred. Having mixed lighting with different temperatures such as florescent or sunlight will create artifacts in the montage process and should be avoided.
The goal of good lighting is to reduce the loss of image details caused by bright spots and shadows.
We recommend against high intensity microscope lights for digital photography. The fan on the lights creates vibration and the light is difficult to diffuse.
If not using a ring light, light sources from multiple angles will be required. 2 light sources at a minimum but 3 is preferable.
Dome Light
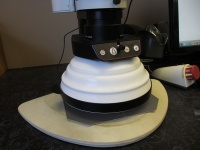
Leica light dome (Leica LED5000 HDI) readily provides even diffuse light. It is expensive. Effective homemade systems are listed below.
 |
White Foam
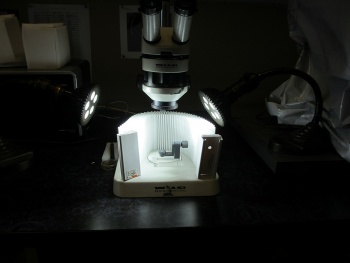
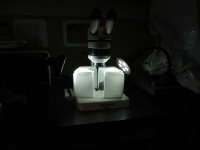
The White Foam technique uses LED reading lights along with the foam found on the bottom of specimen trays. It is assembled using specimen pins making it cheap and easy to assemble. A Styrofoam cup can also be used for this set up.
 |
Diffusion Paper
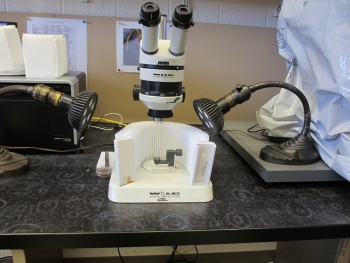
Diffusion paper is used by photographers to create diffuse light. This system can use the same LED reading lights from the White Foam section. They diffusion paper is used to encircle the specimen. In a pinch any white material that diffuses light can be used.
Window Diffuser
This system uses Window light diffusers cut into strips and wrapped around the specimen. It uses the same LED reading lights.
 |
Examples of Lighting
The table below lists a series of common lighting problems along with example images, possible causes, and possible solutions.
Specimen Angles
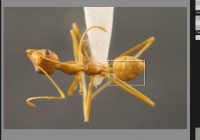
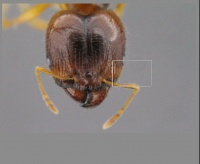
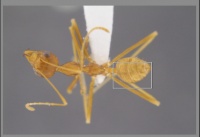
- A standard set of shots will cover the general anatomy of a specimen. This set of shots is a frontal view of the head, a dorsal view of the body, a lateral view of the body, and an image of the specimen labels.
- Other shots that might be useful are a ventral shot of the body and wing images.
- Detailed shot of specific body parts can also be taken as required at higher magnifications. For advice on the best angle for detailed anatomy consult an expert in the taxon for the best angle(s) for the image.
- A large gallery of example ants can be found in Ant Diversity of Gorongosa National Park Gallery.
- If possible the specimen should be facing left for habitus shots. For specific body parts choose the position that gives the best shot and information.
- Carefully remove any lint, hair, or debris from the specimen with a pin or small brush. DO NOT do this for types.
Ant Specific Tips
- Lateral Shots
If possible push down legs to unblock the side view. Specifically the later thorax(mesosoma). Do not manipulate legs if imaging a type specimen.
- Frontal View of Head
Use the eyes to align the head in the same plane. Bring the head to the anterior margin of the clypeus in the the same focal plane. If mandibles are important image them separately.
- Dorsal View
Use the thorax (mesosoma) as your focal plane regardless of head position.
- Labels
If labels are large image them with a hand held camera. Include ALL LABELS on the pin.
Scale Bars
- It is essential that all specimen images have a scale bar on the image. The scale bar should not obstruct any view of the specimen. It should also have sufficient contrast to stand out from the background.
- Scale bar units should be metric.
- Creating scale bars will be different for each system. Some systems support scale bars. Other will have to be created and added using image processing software such as Photoshop.
Image Capture Software
This section describes image capture software that is currently available. Many cameras with drivers will have this ability. Systems built by single manufacturers will have built in systems and come with manuals.
Canon EOS
Canon EOS 6D, 6D Full chip DLSR. Excellent images. The interface allows the user to control virtually all of the camera's features via a computer.
The Canon EOS 7D (Mark II) allows the user to take images with an interface on the desktop. The interface allows the user to control virtually all of the camera's features. Instructions on how to use the 7D directly from your computer can be found here.
Saving Images
- Images should be saved in a TIFF format or other non compression/archival format.
- Back up your files.
- Large hard drives are recommended.
- DO NOT save source images after composite image is complete.
Naming Files
Listed below are what we consider essential information in a file name.
- The file name should include Genus, Species, Shot Angle/Aspect, and Unique identification number.
- The unique identification number should be the specimen's database identification number.
- Example: Numb01_Pheidole_bicolor_aspect.tif
Image Processing
Montaging
Montaging/Focus Stacking is the process of combining multiple source images from different focal planes into a single source image.
Software Available
The list of programs below are the programs we are currently aware of. Prices and functionality vary widely. Consider your current and future needs before purchasing.
- List of Program
- Auto Montage
- Zerene Stacker
- Helicon Focus
- Combine Z (Freeware)
- Photoshop CS 6 and higher
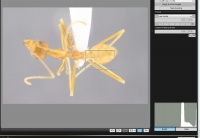
- Leica Application Suite
General Features
- Source Images - raw images used to create the final image. They should be stored in a single, isolated folder with no other source image sets. Image names should have sequential numbers corresponding to their position in the set of images.
- Radius/Patch Size - Area of the image that the algorithm processes at any given time. The area increase with the number.
- Smoothing - This process reduces artifacts left over from the montaging process. Larger number means it will soften the sharpness of images.
- Retouching - This method allows the user to fix parts of the image the were damaged during the montage process.
Photoshop
This section describes the photoshopping process for images. Before you start processing a large set of image it is recommended that you make a backup folder in case something goes wrong. It is considered best practice to leave the original image as an unaltered TIFF image in case you need to refer back to it. The original image should never be saved over.
Processing
- Crop - Trims away unnecessary parts of the photo and allows the specimen to be better framed.
- Levels - Adjusts the lighting levels to enhance the visibility of details. It improves contrast as well.
- Sharpen/Smart sharpen - Detects and sharpens edges and removes blur.
- Image Size - Pixel dimensions of the final images.
- Export Format - The image format the final product is saved as.
- Spot Healing Brush tool - Removes halo artifacts from around the specimens. A good montaging software can eliminate the need for this step.
Imaging Systems
MCZ Leica Imaging System
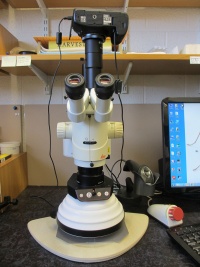
System Components (used for ant images in Entomology Department, Museum of Comparative Zoology, Harvard University)
- Microscope
| Part | Part Number | Use |
|---|---|---|
| Leica Microscope | MZ16 | Steromicrosope body. Up to 11.5 magnification |
| Leica Light Dome | LED5000 HDI | Provide even diffuse light for specimen imaging |
| Objective Lenses | Find | Objective lenses with magnifications 0.5x, 1.0x, 1.6x |
| Motor Zoom | Find | Driver, rail, and control knob that allow the user to adjust the focal plane. |
| Shifting base | Find | Allow the user to change between stereo view and video view |
| Trinocular Head | Head | Allows the camera mount to occur |
| Leica phototube | 10445930 | Attaches to the C-mount and enables the camera to be attached. Increases magnificantion by 1.0x |
| Diagnostic Instruments connection Lens | DD20DMT | C-mount for attaching digital camera to the Leica phototube. |
| Canon 7D Digital Single Lens Reflex Camera | Find | Camera for taking images. |
| Canon DC coupler | DR-E6 | Camera power cord battery for long term camera use |
| Micro USB to USB cable | Find | USB cable for connecting camera to computer |
- Computer
- PC Dell Studio XPS using Windows 7 Enterprise
- Processor 2.93 GHz ; RAM 6 GB ;
- Software
- EOS Utility Canon Driver software
- Helicon Focus 5.3 (frequent updates per year)
- Photoshop CS6
- Other
- Diaphram set to maximum open position [Image]
- Neutral Gray background card [Image]
